Key Takeaways
-
Use certification testing with calibrated field testers instead of basic continuity checks to verify your cabling meets published standards and can handle the speeds you paid for.
-
Respect the 100-meter channel rule—up to 90 meters of installed cable plus 10 meters of patch cords—to avoid signal fade, errors, and retransmissions that slow your network.
-
Choose higher-grade cable like Category 6A for future-proofing; it costs less to install now than to re-pull cable later when adding VoIP, cameras, and Wi-Fi equipment.
-
Keep data cables separated from power lines, motors, and electrical equipment at right angles; electrical noise from these sources is a leading cause of signal interference and errors.
-
Save all certification test reports as a baseline to prove compliance, troubleshoot future issues by comparing results, and plan upgrades with confidence about your current infrastructure.
-
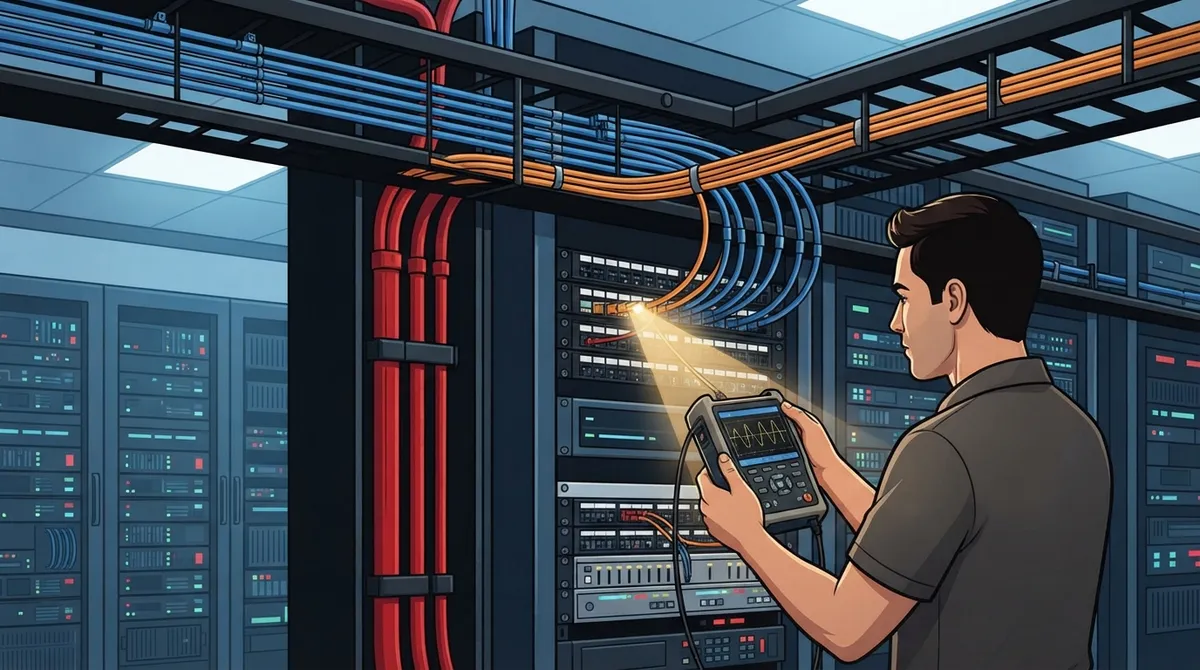
Fiber optic cabling is tested by measuring optical insertion loss at connectors and splices using a light source and power meter; dirty connectors are a leading cause of high signal loss.
Ever had a phone call cut out right in the middle of a big sale? Or watched a video meeting freeze while everyone stares at a spinning wheel? Before you blame your internet provider, look at the wires behind your walls. Cabling signal quality is often the hidden culprit.
Cabling signal quality is how well your copper and fiber links carry voice, data, and power without errors or slowdowns. It is not just about whether a cable “works.” It is about whether it meets the speed and distance your business actually needs.
The good news? You can control it. In this friendly guide, we will walk through nine practical tips that help small business owners, IT managers, office managers, and franchise operators build networks that stay fast and steady in 2026. Let’s dive in!

Why Cabling Signal Quality Matters for Your Business
Think of your network cabling like the plumbing in your building. If the pipes are clogged or leaky, even the best water source will not help. The same goes for cables. A great internet plan cannot fix a poor cable run.
Poor cabling can cause:
- Dropped or choppy VoIP calls
- Slow file transfers and laggy cloud apps
- Random disconnects that are hard to trace
- Frozen security camera feeds
- Wasted IT hours chasing “mystery” problems
If you have ever wondered why your business internet is so slow, the answer may live in the walls, not the router. Good structured cabling gives every device a clean path to the network.

Tip 1: Test With Certification, Not Just Continuity
Here is a common mix-up. A basic tester checks that wires connect end to end. That is called continuity. It sounds helpful, but it does not prove your cable can handle the speeds you paid for.
Certification testing is different. A calibrated field tester measures real performance against a published standard. It gives you a clear pass or fail result for each link.
Certification vs. Qualification vs. Verification
| Test Type | What It Tells You | Best Used For |
|---|---|---|
| Verification | Basic wiring and continuity | Quick checks for opens, shorts, and swaps |
| Qualification | Whether a link may support a certain technology | Troubleshooting existing cables |
| Certification | Whether a link meets a specific standard | Acceptance of new installs and proof of compliance |
Qualification testers are handy, but they do not give the same standards-based proof as certification. For new installs, ask for certification.
Tip 2: Know the Copper Measurements That Matter
You do not need to become a cable engineer. But knowing the basics helps you read a test report with confidence. For twisted-pair copper, certification looks at several measurements. Each one catches a different kind of problem.
- Wire map: Confirms each wire lands on the right pin.
- Length: Makes sure the link is within allowed limits.
- Insertion loss: Measures how much signal fades along the cable.
- Return loss: Shows how much signal bounces back because of impedance mismatches.
- NEXT (near-end crosstalk): Measures signal leaking between pairs at the near end.
- ACR-F (far-end crosstalk): Checks leakage between pairs at the far end.
- Propagation delay and delay skew: Confirm signals on different pairs arrive close together in time.
Each of these limits depends on the cable category and the standard being used. They are not one-size-fits-all numbers, so always test against the right limit for your cable type.
Tip 3: Respect the 100-Meter Channel Rule
Distance is one of the easiest ways to lose signal quality. A common structured cabling channel allows up to 100 meters (328 feet) in total. That usually breaks down like this:
- Up to 90 meters (295 feet) of installed horizontal cable
- Up to 10 meters (33 feet) total for patch cords and equipment cords
Push past those limits and you risk errors, retransmissions, and slower speeds. The exact allowed setup depends on the standard and category, so confirm it during planning. If you are mapping out a new space, this guide on how to plan network cabling installation in Tampa Bay can help you avoid long runs from the start.
Tip 4: Match the Cable Category to the Job
Not all copper cable is equal. Higher speeds need tighter performance. Category 6A, for example, is designed to support 10GBASE-T over a full 100-meter channel. Category 6 may support 10GBASE-T only over shorter distances or under certain conditions.
Category 6A is tested across frequencies up to 500 MHz for key performance measures like insertion loss, return loss, and NEXT. That extra headroom is what makes it a strong pick for busy offices.
So which should you choose? Think about tomorrow, not just today. If you are adding VoIP phones, Wi-Fi access points, and cameras, higher-grade cable can save you a costly re-pull later. Our breakdown of CAT5e and CAT6 differences is a friendly place to start, and these Cat6 cabling facts add helpful detail.
Tip 5: Watch Out for the Top Signal Killers
Most signal quality problems trace back to a short list of causes. Knowing them helps you spot trouble early.
| Problem | What Happens | Simple Fix |
|---|---|---|
| Excessive cable length | Signal fades too much | Keep runs within channel limits |
| Poor terminations | Higher crosstalk and return loss | Use trained installers and quality connectors |
| Untwisted pairs at connectors | Crosstalk increases | Keep pairs twisted right up to the termination point |
| Sharp bends or damaged cable | Impedance changes, signal loss | Respect bend radius and avoid crushing |
| Low-quality patch cords | Failures even when the installed cable is fine | Use certified, matching-category patch cords |
| Electromagnetic interference | Noise and errors | Separate data cable from power wiring |
Notice how many of these come down to workmanship. That is why a skilled team matters. If you are weighing your options, this look at DIY vs. professional cabling shows what is really at stake.
Tip 6: Keep Cables Away From Noise
Electrical noise is a sneaky signal thief. Power lines, fluorescent light ballasts, motors, and large appliances can all create interference. Data cable that runs too close to them can pick up that noise.
A few easy habits help:
- Keep data cable separated from power wiring
- Cross power lines at right angles when you must cross
- Route cable away from motors, elevators, and heavy machinery
- Use proper pathways, trays, and supports instead of loose bundles
Good routing is free protection. A clean layout today saves troubleshooting headaches tomorrow. It is also one of the biggest differences between a real plan and ad-hoc wiring.
Tip 7: Test Fiber by Measuring Loss
Fiber plays by different rules than copper. Instead of crosstalk, the big question is optical loss. Every connector and splice eats a little light, and the fiber itself adds attenuation over distance.
The Fiber Optic Association offers planning estimates of about 0.5 dB per connector and 0.2 dB per splice, plus fiber attenuation. Your actual acceptance limit must be calculated for your fiber type, wavelength, length, and standard.
How Fiber Is Tested
- Inspect and clean connectors. Dirty end faces are a leading cause of high loss.
- Run an insertion loss test. Use an optical loss test set, or a light source and power meter, for end-to-end results.
- Use an OTDR when needed. An OTDR helps locate breaks, splices, or high-loss connectors, but it does not replace end-to-end loss testing.
- Compare against your loss budget. Save the results as your baseline.
Singlemode testing commonly uses 1310 nm and may also use 1550 nm. If fiber is on your roadmap, see how to choose fiber cabling for your business network and our overview of fiber optic cabling for commercial buildings.
Tip 8: Save Your Test Results as a Baseline
Here is a tip many businesses skip. When testing is done, keep the reports! Saved certification results act like a health record for your network.
They help you in three big ways:
- Acceptance: Proof your installer delivered what was promised.
- Troubleshooting: Compare today’s results to the original when something acts up.
- Future changes: Know what you have before adding new equipment.
For multi-location franchise operators, consistent test reports also make it easier to hold every site to the same standard. That is a big win for scaling.
Tip 9: Plan Signal Quality Around Power and Devices
Today’s cabling does more than carry data. It powers VoIP phones, wireless access points, and IP cameras through Power over Ethernet (PoE). That makes cable quality even more important.
When your cabling supports voice, video, and access control on one network, a weak link can affect several systems at once. That is why structured cabling that supports VoIP and cameras should be planned as a whole. Clean cable also helps when you invest in cloud video security, since streaming video needs steady, error-free links.
Also think about growth. Adding a few extra drops during installation costs far less than opening walls later.
When Should You Retest Your Cabling?
Cabling is not “set it and forget it.” Consider testing again when:
- You move offices or remodel
- You upgrade to faster switches or 10-gigabit speeds
- You add PoE devices like cameras or access points
- You notice slow speeds, drops, or repeated errors
- Someone has made changes or additions to the cable plant
If several of these sound familiar, check out these signs your business needs structured cabling, or review common structured cabling mistakes to see if any hit close to home.
Choosing the Right Cabling Partner
Signal quality is only as good as the team who builds and tests it. Look for a partner who follows standards, certifies every link, and hands you documented results. Ideal Solutions Provider is a Tampa-based telecom and IT partner with over 24 years of experience, offering structured cabling alongside VoIP, internet, networking, and security. Having one point of contact means your cabling, phones, and cameras are planned to work together.
You can also get to know the team through our YouTube channel, or follow along on Facebook and Instagram. To learn what to look for, read how to find a reliable structured cabling contractor and explore our structured cabling services.
Final Thoughts
Strong cabling signal quality is the quiet hero behind every clear call, fast download, and smooth video feed. When you test properly, follow distance limits, choose the right category, and protect against noise, your whole network gets better.
Not sure where your cabling stands? We would love to help. Contact us for a free consultation and let’s make sure your network is built to perform in 2026 and beyond.
FAQs
Q: What does signal quality mean in business network cabling?
A: It means how reliably a copper or fiber link carries signals within the limits your service needs, like Ethernet, voice, or PoE. Good signal quality keeps errors, retransmissions, and dropped connections to a minimum.
Q: How do you test Ethernet cabling signal quality?
A: Use a calibrated field tester to certify each link against the right standard. It checks things like wire map, length, insertion loss, return loss, and crosstalk. A simple continuity check alone is not enough.
Q: How long can a business Ethernet cable run before signal quality drops?
A: A common channel allows up to 100 meters total, with about 90 meters of installed cable and up to 10 meters of patch cords. Exact limits depend on your cable category and the standard, so always confirm during planning.
Q: How is fiber-optic cabling signal loss measured?
A: Fiber is measured by optical insertion loss using a light source and power meter or an optical loss test set. An OTDR can help find where problems are, but end-to-end loss testing is still the key check.
Q: When should a business retest its network cabling?
A: Retest after moves, remodels, speed upgrades, or when adding PoE devices. It is also smart to retest anytime you see slow speeds or repeated drops, and compare the results to your saved baseline.